
AI features
Optional AI layer rename and visual grouping live in the plugin UI. They call any OpenAI-compatible chat API with vision support.
These features are independent of MCP. Bridge tools never need an LLM API key.
Setup
- Open the plugin → ⚙ → choose UI language (中文 / English) if needed
- ⚙ → Model settings → set API base URL (default
https://api.openai.com/v1) - Set Model (default
gpt-4o;gpt-4o-minialso works) - Paste your API key
- Click Test connection, then Save
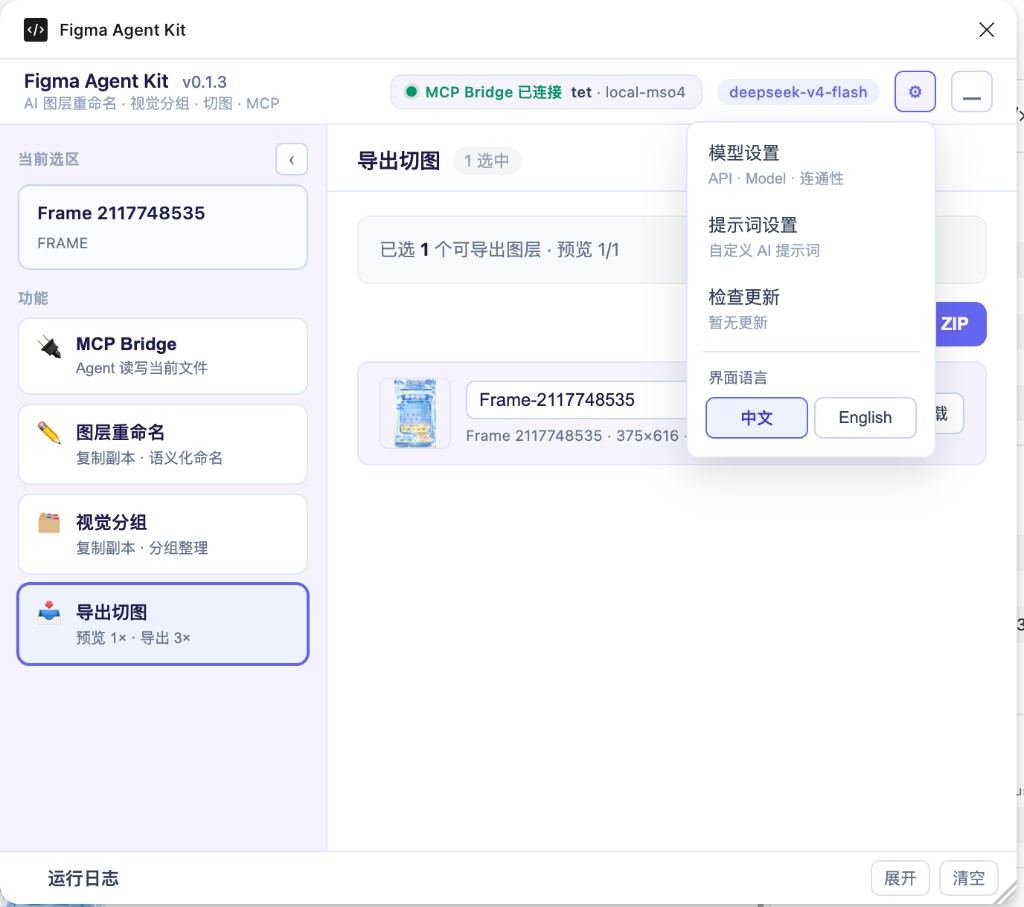
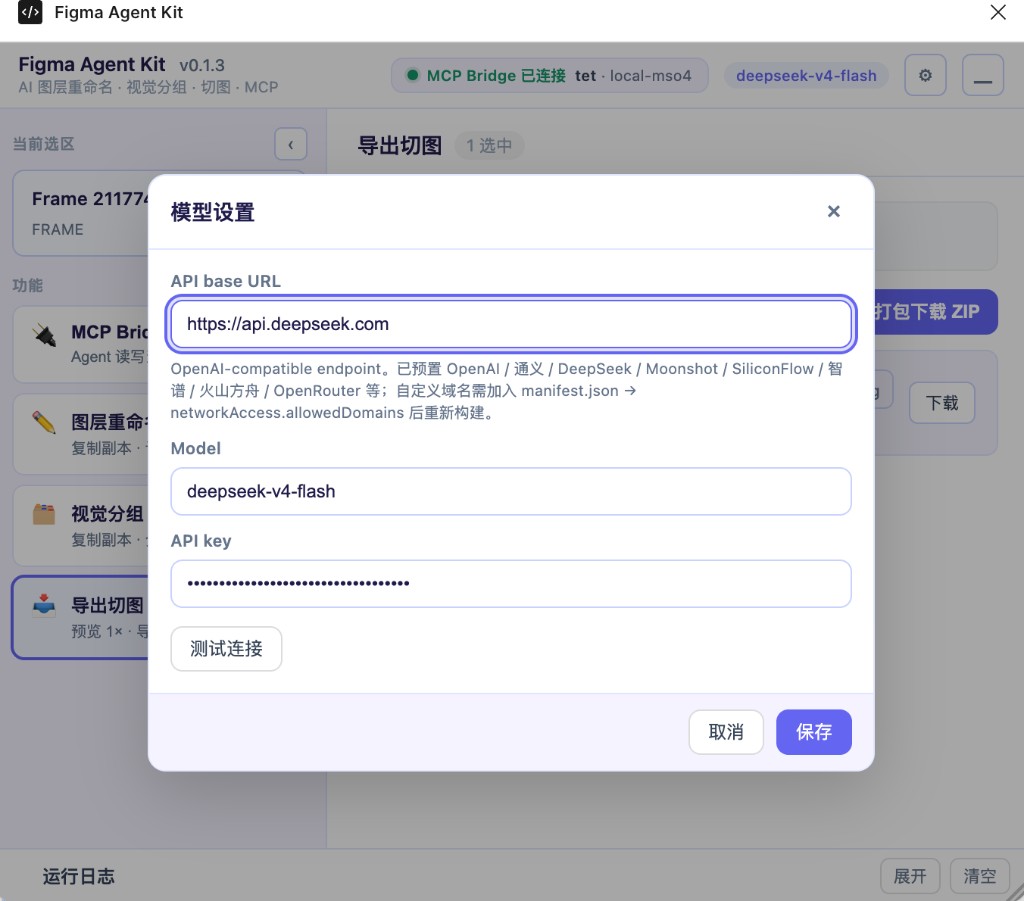
Credentials and language preference are stored in Figma clientStorage on your machine only. UI strings live in packages/figma-agent-plugin/src/ui/locales.json.
Prompt templates
⚙ → Prompt settings — edit system prompts for rename and group separately.
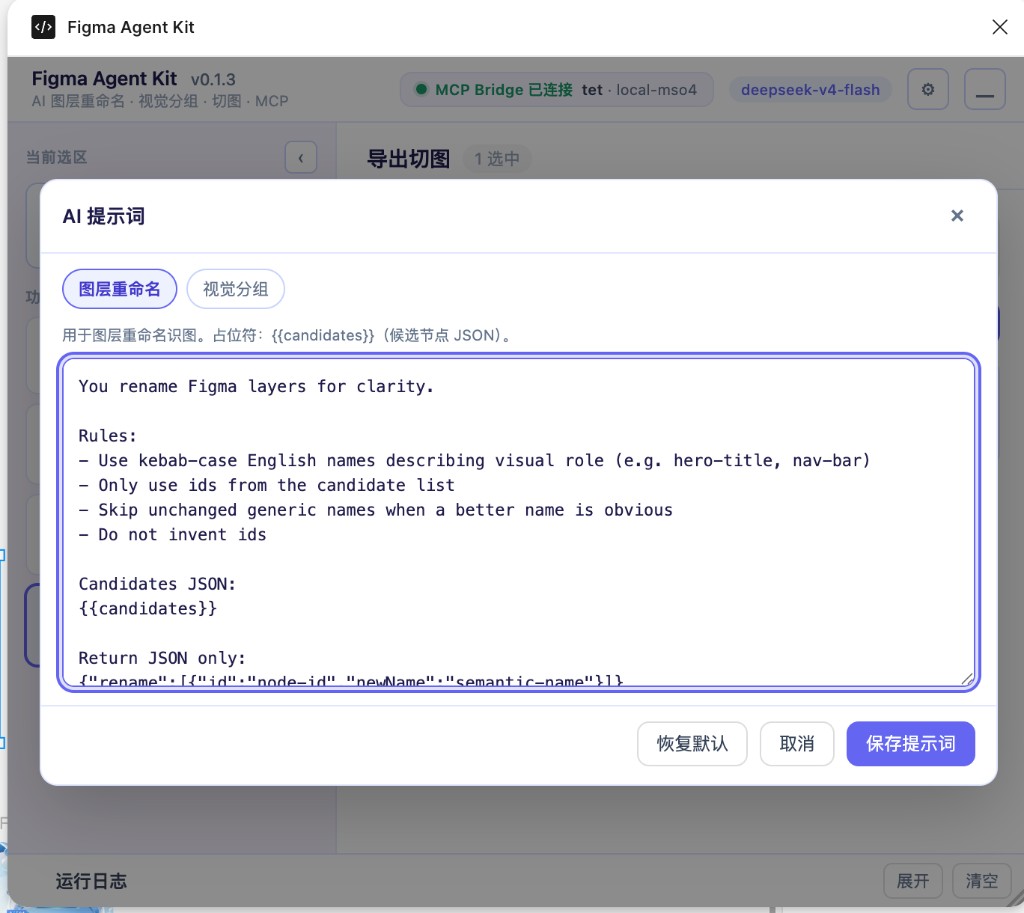
- Defaults:
packages/figma-agent-plugin/src/prompts/*.prompt.txt - Placeholders:
{{candidates}},{{suggestedClusters}}(group) - Restore defaults reloads repo templates; Save writes overrides to
clientStorage
Custom AI providers
Figma plugins must declare allowed domains in manifest.json. This repo already allowlists common hosts, including:
For Azure OpenAI or other custom hosts: add the host to networkAccess.allowedDomains in manifest.json, rebuild, and re-import the plugin.
AI rename
- Select a single Frame or Group
- Open the Rename tab → Start rename
- The plugin clones the selection to the right, exports a 1× PNG, and sends layer candidates + image to your API
- Returned names are applied on the clone (original is untouched)
Skipped: TEXT nodes and very small layers (< 2px).
AI visual grouping
- Select a single Frame, Group, or Section
- Open the Group tab → Start group
- Review/edit the JSON plan in the editor
- Click Apply groups to create nested groups on the clone (depth-first)
The collector also suggests simple row-based proximity clusters as a hint to the model.
Version updates
The plugin fetches:
See Plugin release for how version.json is updated.